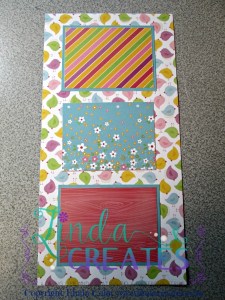
I created this Penelope Flip Flap Class for my friend Kim and her friends. They wanted to have a more “hands on” class for learning to use all the different types of flip flaps on the scrapbooking pages. Here’s the base layout I created:

You have room for 5 or 6 pictures on this layout. You can see the “shiny” of the flip flaps over some of the photo areas. By adding various sizes of flip flaps, you can actually get 20 pictures on this layout!

That’s certainly helps to get one event in between 2 pages!! Here’s a picture to help you see the flip flaps:

Have some more pictures you need to fit in? Use our 12″ assortment Z1325to help out! By adding a 12″x6″ flip flap to the left page you can get this:

You create a 12″x6″ page to slip into the flip flap. In the class they will make this:

I added the glitter to my title and some of the vellum butterflies from the Penelope Compliments. If they want to add those, they can purchase any of the wonderful coordinating embellishments or compliments. One of my favorite things about CTMH is how they provide coordinating options for you to bling up your pages. Once I get the Easter pictures in, I will add more to the pages.
Back to adding flip flaps. This 12″x6″ flip flap will allow you to add four more 3″x4″ pictures to the layout, taking you up to 24 pictures now! You can even add 3″x4″ flip flaps to all four of these pictures to add 8-16 more pictures (one on the Easter side and three on the backside). Amazing, right!?

Cost of the class is $20.00. What you get:
- Penelope Paper Pack ($12.00)
- Pack of 4″x6″ flip flaps ($5.00)
- 2 Page Protectors ($2.20)
- 1 – 12″x6″ flip flap ($0.75)
- 3 extra sheets of cardstock ($3.00)
- Title cut ($0.75)
- Black and white directions for cutting the paper and assembling the base layout ($0.50)
- Total Value = $24.20

Want to take this class? Let me know! Thanks for stopping by.

Leave a Reply